The Battle of Culloden
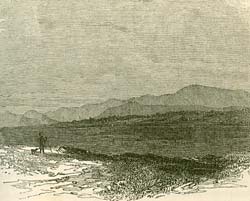
Culloden, or Drumrossie Moor
From The Popular History of England by Charles Knight, Vol. VI (London: Bradbury and Evans, 1860)
Charles had captured Inverness and was determined not to give up the town. Lord George Murray was convinced that the Highlanders should retreat into the hills and fight there, but Charles disagreed and took the advice of O'Sullivan, an Irishman in his service. O'Sullivan thought that the Highlanders ought to stand and fight on Drummossie Moor, just north of Inverness.
On 15th April, 1746, the Highland army moved to Drummossie Moor. The chiefs were horrified when they saw the position: the moor was flat, but with many holes and ditches among the heather. This meant that the Highlanders would find it difficult to charge, neither could they conceal themselves from the cannon and musket fire of the British army.
Cumberland and his army of over 8,000 men did not appear that day. They were at Nairn, ten miles away, where Cumberland was celebrating his twenty-fifth birthday. After the Highlanders had stood on the Moor all day in the rain, Charles decided to make a night attack on the British army at Nairn. His Highlanders were cold, tired and many were starving - but it seemed the best hope.
The night attack was a complete failure. The Highlanders were too tired to march fast and Lord George Murray saw that they would not reach Nairn before daylight. The exhausted clansmen therefore turned back, and wearily made their way to their former positions on Drummossie Moor. Two hours after they had arrived, they heard news that the British army was on the march and only four miles away. The Highlanders dragged themselves to their feet and formed a line. The decisive battle was about to begin.
The following account of the battle is adapted from an issue of The Gentlemen's Magazine which was published at this time. This account sees things entirely from the British point of view.
On the 16th April, between four and five in the morning, the King's Army marched from Nairn in five lines of three battalions each. The cavalry on the right and left protected the infantry and the cannon. The Army marched like this for about eight miles, and then the enemy were seen advancing. The Army therefore took up its battle positions; the first line was formed by six battalions, with two cannon between each battalion.
On the right of the front line were three squadrons of cavalry, and on the left another three squadrons. The second line of battle was made up of five battalions, with three cannon in between each battalion. These five battalions were placed behind the gaps in the first line, so that they could deal with any of the enemy who got through. Behind the first two lines there was a reserve of four battalions, widely spaced: this had two squadrons of cavalry on the left, and two squadrons on the right.
The rebel army formed a line of thirteen groups, each of which was made up from a clan. In the centre of the line were four cannon, and four cannon were placed on each wing. On the far right of the rebel's line were FitzJames' cavalry and about four hundred French troops. On the left were another four hundred troops and Prince Charles' cavalry. Behind the army were three columns of troops as a reserve: one on the left, one in the centre, and one on the right.

Plan of the battle of Culloden
At two o'clock the battle began. The rebels fired their cannon at our Army, but did little damage. Our Army returned the fire with great success and cut down a large number of the rebels. The rebels then charged towards our right wing, waving their swords in the air and shouting: they hoped to tempt our right wing to leave the battle line and attack them. But His Royal Highness, the Duke of Cumberland, commanded these troops himself and they kept to their line. The rebels then made a mass attack on our left wing: they ran forward, sometimes stopping to fire their pistols and muskets and reload. They were met with fierce musket fire from the British, and were almost cut to pieces by our cannon. The whole weight of the rebel attack fell on two battalions of the British left - the Scots Fusiliers and Munro's. It seemed that the rebels would get round the left wing, but Colonel Wolfe moved up his battalion to stop this. Here the bayonets of the British caused great slaughter of the rebels.
The rebel charge failed and their army fell back. On the left, the British cavalry rode through gaps which had been made in a stone wall and attacked the rebel right wing which was put to flight with its reserve. The cavalry on the British right also rode round the rebel wing and attacked the enemy from behind. At this, the rebel army fled. The British infantry advanced and gained ground where the rebels had stood. There our men gave three cheers.
Further details of the battle can be seen in Document 15.
Next page: Treatment of the Highlanders